Photographing cities is a great way of travelling, whether home or abroad, and experimenting with city landscapes as well as candid street portraits. You don’t need to go far either to get great city shots! While large capital cities like London can be bursting with life and plenty to see, you can still get great shots by visiting your town centre and keeping a keen eye out for those special photo opportunities.
City and architectural shots are very similar to landscape photography in regard to working with tricky daylight, though street photography also has the added challenge of straight lines from buildings which can sometimes look odd due to lens distortion.
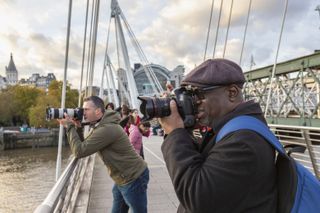
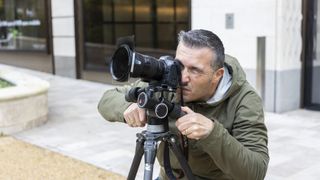
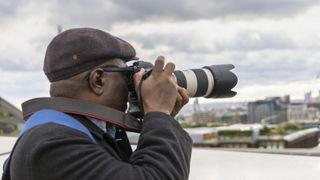
This month we teamed up with a reader of PhotoPlus: The Canon Magazine (opens in new tab), Robetson Egueye, for a travel photography masterclass with Canon pro Jeremy Flint in the metropolitan heart of England, London.
• To shoot stunning shots of your own, check out the best lenses for street photography (opens in new tab)
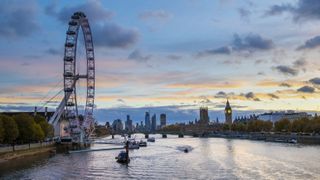
Jeremy is a Canon pro photographer who specializes in travel, landscape and location photography. He won the National Geographic Traveller Grand Prize in 2016 and the Association of Photographers Discovery Award in 2017. We met him by the Tate Modern in London to photograph iconic architecture such as the Millennium Bridge, London Eye and St Paul’s Cathedral.
In this article he reveals his top 10 tips for travel shots…
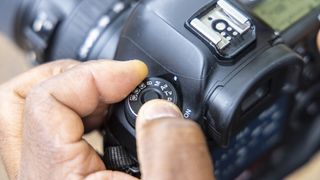
1. Use aperture priority mode
(opens in new tab)
Jeremy set Robertson’s Canon EOS 5D Mark IV (opens in new tab)to its Aperture priority mode, also called Av on the mode dial, which stands aperture value. This is a semi-automatic mode that allows Robertson to set the aperture to f/8 for a strong sharpness and deep depth of field.
His Canon EOS will then work out the shutter speed based on the metering mode, which was set to Evaluative to take into consideration the exposure across the whole frame.
2. Rate your favourite shots
(opens in new tab)
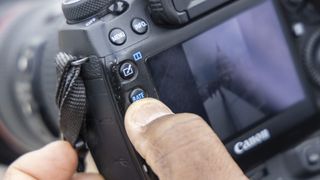
When Jeremy knows he’s onto a winner with a composition, and his picture is perfectly sharp and correctly exposed, he quickly hits the Rate button on the back of his Canon EOS R5 (opens in new tab) . He showed Robertson how to do this on his EOS 5D Mark IV. The Rate button allows you to quickly embed a star rating value into the metadata of your photos which makes it easier to find your favorite images that you’ve rated in programs such as Adobe Bridge or Lightroom Classic CC (opens in new tab) using the 1-5 star filters.
3. Use a polarizing filter
(opens in new tab)
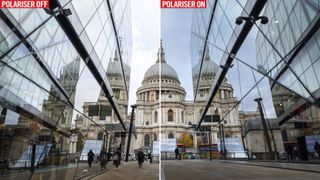
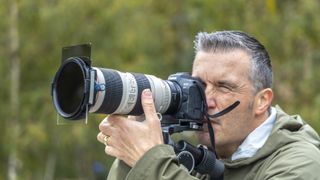
Jeremy almost permanently has a LEE polarizer filter attached to his lens as it’s a powerful tool that blocks out a little light for longer exposures by reducing the polarized light into the lens. In effect, the lower polarized light levels helps reduce glare on reflective surfaces such as glass and water, and also makes blue skies a little punchier.
• Best filters for photography
4. Fix converging verticals
(opens in new tab)
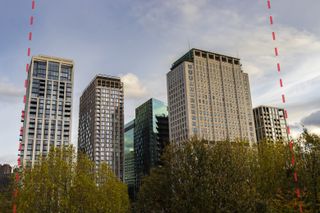
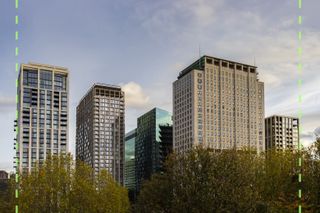
Unless you shoot on a specialist Tilt-Shift lens, you’re likely to experience converging vertical lines in your images with normal lenses, especially when pointing your camera towards skyscrapers with a wide-angle lens. Converging verticals has the often adverse effect of making tall, towering buildings appear to ‘lean’ in towards the middle of your composition. You can, however, fix converging verticals by correcting the perspective with the Free Transform command in Photoshop CC.
5. Change your focal length
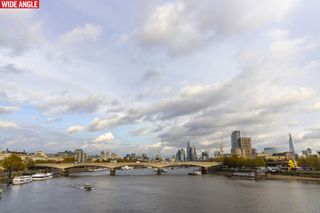
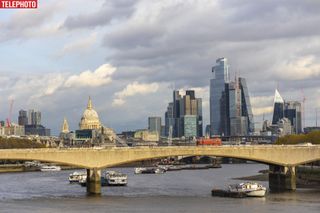
The focal length of your lens determines how wide-angle or telephoto your scene appears. There’s no correct focal length, this is down to personal preference, though it’s a good idea to have at least a couple different lenses with varying focal lengths so you can change things up if you need to.
A wide angle lens such as 24mm (full-frame) or 18mm (APS-C) will have a wider, more expansive angle of view, while a telephoto lens such as 200mm will appear more zoomed-in, and allow you to pick out smaller details within your frame as well as crop out distracting elements.
6. Professional tripod
(opens in new tab)
A tripod is essential, allowing you to take your time to fine-tune the composition, eliminate camera-shake, and to use long exposures to blur moving elements of your scene, such as clouds, water or even people walking past. Jeremy’s tripod is a professional Gitzo GT2542LS which is a light carbon-fibre model, making it easier to lug around big cities. He’s paired it with a Manfrotto 405 geared head. (opens in new tab)
7. Expand your dynamic range
Architectural cityscapes are very similar to landscapes because achieving a perfect exposure between dark foreground and bright skies is a real challenge. While shooting Raw helps capture more exposure information, you can obtain even more data by taking a bracket of shots at brighter and darker exposures, and then merging them together in post-production. HDR (High Dynamic Range), helps you create an image with deep shadows while retaining bright highlights for a range of tones.
8. Shutter release cable
(opens in new tab)
When shooting long exposures on a tripod, camera shake can creep in. Even the simple action of pressing the camera shutter button can cause image softening vibrations. Jeremy uses a Canon TC-80N3 shutter release cable to mitigate camera shake so he can fire remotely and not risk adding movement. This release cable also has functions such as an interval timer for timelapses and has a remote timer which can be set between 1 sec to 99 hours.
• Best camera remotes and cable releases
9. Telephoto zoom lens
While cityscapes may be synonymous with super wide sweeping city views, a telephoto lens is also a very useful optic to have in your kit bag. Lenses with a telephoto focal length over 50mm (what the human eye sees), such as a 200mm lens, will have a high magnification and help you ‘zoom in’ to achieve frame-filling shots of far-away subjects.
This is great for picking out a specific detail or building in a broader scene. Zooming in also helps you crop out distractions and eyesores such as cranes. Jeremy’s telephoto lens of choice is the Canon EF 70-200mm f/2.8L IS USM (opens in new tab).
• Best 70-200mm lenses (opens in new tab)
10. Full-frame camera
Jeremy uses full-frame Canon cameras for his architecture and city and shots. His old workhorse Canon was an EOS 5D Mark IV DSLR, but he’s now made the switch to the 45Mp Canon EOS R5, a mirrorless full-frame Canon body. He also uses an EF-EOS R adapter so he can use his old Canon EF lenses with the RF mount on the R5. He still travels with his older DSLR and uses it as a backup.
If you’re really into cityscape photography, you’ll want to check out the best cameras for street photography. Jeremy uses a Canon EOS R5 (opens in new tab). To see his stunning portfolio or to book a workshop visit his website (opens in new tab).

