Landscape photography is an amazing way of getting out into the great outdoors, keeping fit and helping your camera skills stay sharp. Coastal photography, also called seascapes, is brilliant sub-genre of landscape photography. If you can get to the coast you’ll be rewarded with sandy beaches, crashing waves, bold sea defences, striking piers, lighthouses and much more.
Coastal photography can be a bit trickier than might first seem, and that’s why this month we teamed up with a reader of PhotoPlus: The Canon Magazine (opens in new tab), Dave Curley, for a seascapes masterclass with Canon pro Andrew James around the UK’s picturesque Norfolk coastline..
• To shoot stunning shots of your own, check out the best lenses for landscape photography (opens in new tab)
With more than 20 years’ experience working on photo magazines, Andrew now runs the online photo learning site Foto Buzz (opens in new tab) as well as hosting landscape workshops on the Norfolk coast. His Canon images have won prestigious photo awards, and he’s a regular contributor to PhotoPlus and Digital Camera magazines. We met up with him for sunrise at Happisburgh, to shoot some of his favourite spots along the Norfolk coastline. Here are his top 10 tips…
1. Aperture priority mode
(opens in new tab)
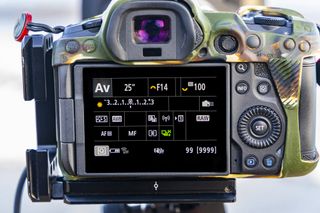
At the beginning of the day, Andrew set Dave’s Canon EOS R5 to its Aperture Priority mode (Av on the mode dial). This is a semi-automatic mode that allows Dave to choose his aperture, so he can achieve the depth of field required for his shots; and the ISO to control how sensitive the camera is to light. His EOS R5 will then set the shutter speed required for a correctly exposed image, but he can override this if needed using exposure compensation.
2. Shoot RAW
(opens in new tab)
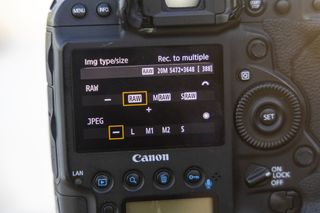
One of the big advantages of an interchangeable-lens system, like a Canon DSLR or a mirrorless Canon camera such as Dave’s EOS R5, is that it has the ability to take Raw images. Raw isn’t an acronym: it means the raw data from the camera, so you can capture much more exposure information than a compressed JPEG.
Andrew enabled this shooting mode on Dave’s camera, which will give him more flexibility in post-production – in particular when adjusting exposure or white balance, which is tricky to do with smaller JPEG files.
3. Exposure compensation
(opens in new tab)
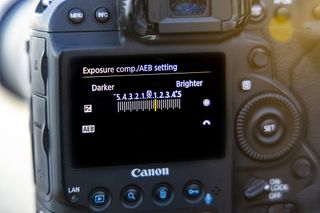
Dave’s Canon EOS R5 camera set to Aperture Priority, a semi-auto mode that works out the exposure based on your camera’s metering mode. Metering was set to Evaluative on Dave’s camera, so that the whole frame would be assessed before working out the exposure; if Dave needed the exposure to be lighter or darker, he could dial in a little exposure compensation to override it.
4. Lens filters
(opens in new tab)
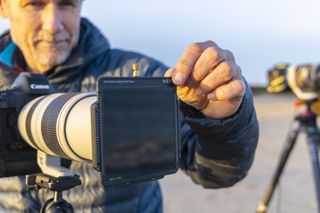
Andrew uses a variety of LEE filters, including a Little Stopper and a Big Stopper, which block out six and 10 stops of light respectively, as well as neutral-density graduated filters. These are essential for balancing out the bright skies in your landscape shots for more even exposures. A 10-stop neutral-density filter can transform a 1/30 sec exposure to 30 seconds! Andrew also uses H&Y magnetic filter frames so he can quickly attach or remove filters from his lenses.
• Best filters for photography (opens in new tab)
5. Telephoto zoom lens
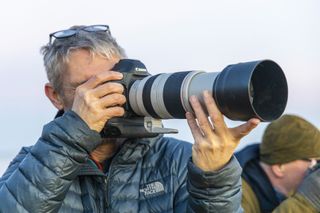
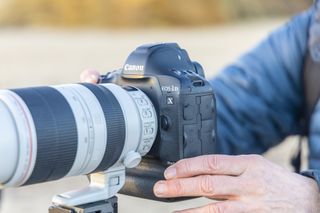
A zoom with a long telephoto reach may sound like an odd choice for seascapes, but Andrew carries a telephoto lens with him whenever he shoots at the coast. Andrew started the morning shooting on his Canon EF 100-400mm f/4.5-5.6L IS II USM, with a focal length ranging from short telephoto at 100mm to a powerful 400mm at the top end. This makes it possible for Andrew to crop out scrappy foregrounds and focus his composition on a specific focal point, such as a distant lighthouse or details of waves breaking. It’s also handy for shooting any wildlife he may unexpectedly come across.
• Best 70-200mm lenses
6. Professional tripod
(opens in new tab)
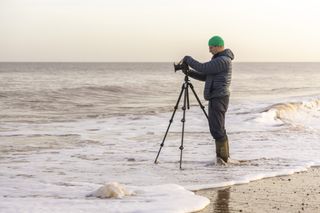
A sturdy tripod is a must-have for anyone looking to get into seascape and landscape photography. It allows you to take much more care while composing: you can really fine-tune your framing, as your camera is fixed in place. It also helps eliminate camera-shake, caused by the vibrations while hand-holding, as well as opening up possibilities for long exposures of several seconds, or even a few minutes. Andrew’s tripod of choice is a Manfrotto XPRO3 055 tripod, with a Manfrotto 496RC2 ball head.
• Check out the best carbon fiber tripods and the best ball heads for tripods
7. LEE Stopper app
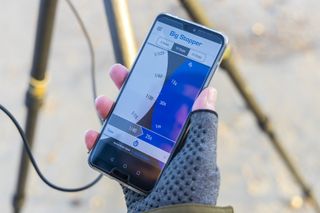
Andrew uses the LEE Stopper Exposure Guide app, which helps him calculate the correct exposures when using a Little, Big or Super Stopper filter (six, 10 and 15 stops respectively). He simply inputs the exposure his camera is currently reading without any filter in place, and the app tells him what exposure he needs to use once the filter has been attached. Andrew frequently reviews his images on the back of the camera to ensure that the exposure is correct, in case the light changes during the exposure.
8. Wide-angle zoom lenses
(opens in new tab)
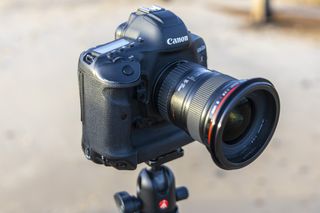
A wide-angle lens is the kind you typically think of for landscapes and seascape shots. It has a focal length lower than 50mm, which is the equivalent focal length to what the human eye can see, so wider focal lengths of around 16mm or 24mm allow you to include more of the scene. Andrew’s wide-angle lens of choice is a Canon EF 16-35mm f/2.8L II USM (opens in new tab), which ranges from ultra-wide at 16mm to wide-angle at 35mm. It also has a wide f/2.8 maximum aperture, allowing it to suck in loads of light, so it’s also an ideal lens to use for astro landscapes.
• Best wide-angle lenses
9. Full-frame Canon bodies
Andrew shoots mostly landscapes and wildlife photography, and switches between his Canon EOS-1D X Mark II and Canon EOS R6 (opens in new tab) bodies depending on the subject. He also uses mostly Canon EF lenses for his DSLR, plus an EF-EOS R adapter so he can use the same lenses on his newer EOS R6 mirrorless body. They’re both full-frame bodies that capture incredible depth and dynamic range; both also have blisteringly fast burst modes, making them particularly handy for Andrew’s wildlife work.
10. Use Bulb mode
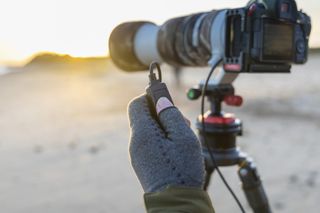
Neutral-density filters can enable exposure times of several minutes, especially when you use a 10- or 15-stop ND filter – but most Canons can only shoot up to 30 seconds by default. The trick to taking exposures longer than 30 seconds is to use Bulb mode, which will keep the exposure rolling for as long as the shutter button is pressed down. Pressing the shutter button will inevitably cause camera-shake from your hands, though, so you need to use a shutter release cable and lock this off instead, then time your exposure using a watch or a smartphone.
• Best shutter releases
If you’re really into landscape photography, you’ll want to check out the best cameras for landscapes (opens in new tab). Andrew uses a Canon EOS-1D X Mark II and Canon EOS R6. To see his stunning portfolio or to book a workshop visit his website (opens in new tab).
